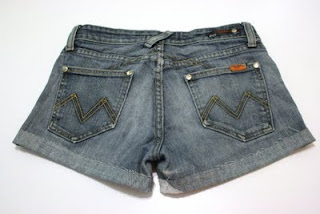
"Hey FAB ladies.. somethin' to do?
Last summer, I noticed bermuda-length cuffed jean shorts were all the rage, and I made my own out of a pair of old jeans. I did the tutorial here, and still love those shorts and have been wearing them around this summer. But this year, I've noticed another trend in magazines and such. The original cut-off jean short, with a small (sometimes raw-edged) hem."-Marishka
This summer's do-it-yourself cut-off jeans shorts--Tutorial!
 |
| Express (4" long inseam!) |
 |
| Flickr via Pinterest |
 |
J.Crew like a year ago
|
 |
J.Crew this summer
|
 |
| Lucky Mag |
 |
Nordstrom
|
 |
| Pinterest, original source unknown |
 |
You could pay $181 for these True Religion ones..
|

Anyway, so you see the range of styles, lengths, and tightness-es. Quite a few ideas to work from! In all, I'm noticing shorter and looser than last year's longer cuffed jean shorts.
I went into my closet, and pulled out this ancient pair of old favorite jeans. They're from, literally, like 2006. They have spandex in them so they stretch, and I have worn them while at many different weights! Haha, they've been around--they have holes starting on the knees, some paint, and some of my original jeans-mending method patching on the butt.


I wish I had a slighly looser pair, but these will do for this fun DIY project. Here goes the tutorial!
- Start with your old jeans and try them on. Mark with a pen about 2" below where you think you want them to hit your legs. Just in case, you'll give yourself that extra room since you may waste some straightening etc. Begin to cut.
- Cut through the top layer only, to start with, rather than chopping both off at once. The grain is slightly different on the front and back, and you want to get a true straight line.


- Once you've gone all the way around, fold the jeans in half and cut the other side to match as closely as possible. They'll really look homemade if they're not symmetrical!
- Fold them in half and look at them from different angles to make sure both sides are the same.
- You may also want to turn them inside out, so you can see the straight grain of the denim, and shave off little bits of the edges to make them straighter.
- Try them on again. They should be about 1" longer than you'd like them to be.
- To the ironing board. Press about 1" of the jeans up. No need to hem or turn under twice! Wahooo, these are simple!
- Now get out your needle and denim blue thread. This part is sort of optional, I guess, but these will be most wearable if you do this step. Basically, to lock in the cuff and rolled-up look, without always having your shorts moving around in length, you'll hand sew the cuff in place.
- You'll do a running stitch, but make the stitch on top just a millimeter long, and the stitch underneath more like half an inch long. You cover lots of ground quickly this way, but your stitches don't show on top.
- If your jeans stretch at all, like mine did, you'll want to do this in a zig zag pattern. The thread doesn't have the same give as the jeans, so by zig-zagging you give the stitch some flexibility.
All done! Wear and enjoy--your personalized jean shorts, exactly the length you wanted! And so trendy right now!
And, pretty much free. You can't go wrong.


No comments:
Post a Comment